

Today I made my dad's chickpea dahl. My dad is one of the best cook's I know. ......maybe the best..?? Anyway, he's a pretty excellent cook. We grew up eating his good healthy real made-with intention, thought, care, love meals. My mum was a great cook too.
I think childhood memories of food and cooking and being in the kitchen with your parents are some of the strongest memories I have. I think maybe my siblings have similar strong food memories.
A couple of days ago Ari told me he wanted to make hummus for his school class party. He makes a pretty delicious hummus. As I won't buy tinned beans, it meant I had to soak raw chickpeas for his hummus making - so I decided to soak and cook a big batch at once. Which led to deciding what to make with the other chickpeas. And of course it being cosy fire-weather and warm nourishing dinners, I decided to make dahl. Luckily I got to ask my dad how he makes his.

Eric's Chickpea Dahl / Channa Masala -
(as with all my recipes, quantities are fairly inaccurate as I'm not so good at measuring...sorry. I think that's the best way to cook - but instinct and to your own taste).
Ingredients:
1 cup dried chickpeas
3 cloves local or Australian garlic* diced
a knob of fresh ginger grated
1 onion diced (I use the purple ones because I like the caramel sweetness better than brown onions)
2t cumin powder
2t coriander powder
2t paprika or chillis
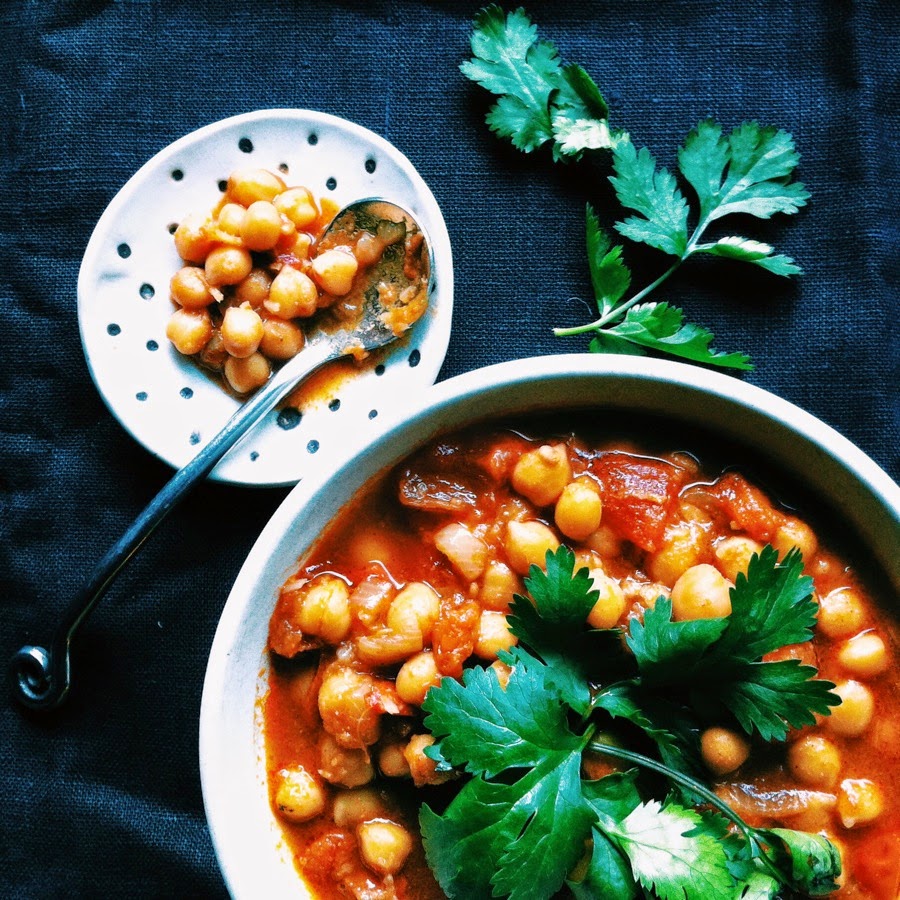
2t sea or rock salt (the one in the photo is pink Himalayan rock salt)
5-7 tomatoes diced
Olive oil or cooking oil
Fresh coriander.
The day before you want to eat your dahl you'll need to soak 1 cup dried chickpeas. Just regular water will do (of course we have beautiful rain water, so you should use filtered water if you have town water). Leave them in the saucepan to soak overnight. And then the next morning top up with water and put on to cook. The longer you soak them, the less cooking time they take. Bring up to the boil and then leave to simmer for some time - may take 1-3hours. Skim any scum that comes to the surface. You want to turn the heat off before they are fully cooked - a little bit of bite left, don't let them cook until falling apart.
Heat a heavy based fry pan (I have a beautiful cast iron one that my parents gave me when I first left home all that time ago and I use it every single day) and add olive oil. I let the oil heat a teeny bit, then add the onion, garlic, ginger and salt and fry until all nice (don't burn it!), add the tomatoes and spices and fry until the tomatoes start to break down. A good five minutes at least.
Drain the cooked chickpeas, but keep the cooking water. Add the drained chickpeas to the fry pan spicy sauce and fry for a further 10 or 15 minutes. Return it all to the saucepan and add a little of the retained cooking water if need. Put the lid on the saucepan and allow to slowly simmer for at least 3 or so hours. Stir occasionally and if needed add more of the cooking water, though the tomatoes make it nice and saucy on their own. Taste the chickpeas and see if they're well cooked and have soaked up the flavours. It can slowly simmer for more than 3 hours if you have the time.
Add freshly torn coriander right at the end, just before serving.
Serve with basmatic rice.
You can also add potatoes and kale during the cooking process if you want to make it a more vegetable meal. Though we like it plain like this and serve it with pan-crispy spiced potatoes which are super yum!
Enjoy. And think of the memories you can start making for your own children to have.
ALSO - in other wonderful and exciting news - our new benchtop was half installed today. Will be finished very very soon. Can't wait. It's so beautiful. We're all dreaming of standing in our new kitchen and cooking and sharing and being in the space. Can't wait to show it to you. And maybe have some of you over for sharing a meal together!
Beautiful spotty bowl by Elke Lucas.
*do not ever, please please, use imported from China garlic. Local garlic grown in your country is much tastier and better for you. Garlic that has been imported from China has been irradiated.
Looks delicious - I may have to try this recipe. I often soak and cook up a large batch of chickpeas, kidney beans etc, then freeze them in 400g bags - ready for use.
ReplyDeleteThanks for this Ellie - this recipe looks and sounds so delish. Thinking the perfect weather to try it too! Hope you have a lovely weekend! Rachael x
ReplyDeleteI just wanted to let you know that I cooked this last night and it was amazing!! So good and we'll definitely be adding this to our regular 'must cook' recipe collection. Thanks so much for sharing it xx
ReplyDelete